Now that you have a website, what do you do with it?… Well whatever you want really, you just need to know how to make it do that thing you want it to do… Adding a gallery, a customer tracking system, slideshow, Product listing, a place your current customers can go for support. Once you decide what you would like to add to your website if it is standard information you can simply add a new page or add the text to an existing page.
If you need to add something that is a bit more complicated you will want to add a Plugin, Module, or Theme. Each does own specific thing.
Lets start
To find out what your website that you have had built by us can do, just load up your website in any Web Browser, Click on the Small key () at the bottom of all of your webpages on your website. From here you can access all of the parts of your website, and important parts of your online system along with details on how to get website updates, website upgrades, and Support.
once you are on your Backend panel. Click on the button for the service you would like to perform.
Making a Page
Instructions coming soon. For the time being just visit this video gallery at youtube for additional guides to building a website.
Making a Post
Instructions coming soon. For the time being just visit this video gallery at youtube for additional guides to building a website.
Adding a Plugin
Instructions coming soon. For the time being just visit this video gallery at youtube for additional guides to building a website.
A Traceroute can be run from your computer to show the path an Internet protocol packet takes as it travels to its destination, Traceroute is a command-line tool installed on all Windows operating systems. Traceroute, or Tracert, is beneficial for troubleshooting a network connection because it displays a list of all locations a packet must connect with prior to reaching the instructed final destination. If packets are failing to reach the final destination, you can use Traceroute to determine the problematic location. Traceroute is very useful for local networks to identify a problematic router or firewall.
Press the “Windows” and “R” keys simultaneously. This opens the Run box on the bottom of your screen.
2
Type “CMD” in the “Run” box and click the “OK” button. This loads the Command Prompt utility in a new window on your screen.
3
Type “Tracert address” and press the “Enter” key. Replace “Address” with the actual address you need to trace. You can use any numerical or alphabetical address. For example, type “Tracert www.google.com” or “Tracert 192.168.0.1” and press “Enter.”
4
Look at the information that displays after pressing the “Enter” key. This is the trace information. Each line is called a “Hop.” Each hop is a point of location that your packet reaches prior to the destination. The numbers with a “ms” next to them are the latency values and the information at the far right is the actual location. A potential connection problem will be indicated by an asterisk “*” instead of a number next to “MS.”
Follow these steps to fix your compromised/hacked site that may be mailing out spam with your name written all over it.
The majority of websites are hacked due to outdated software that is on the your website. Viruses are usually deployed by robots (bots) scanning the internet for specific outdated software which
Scan your site with thishttp://sitecheck.sucuri.net/
If it says your site is blacklisted, You will need to Visit the listed Blacklist Providers and submit a removal request with that individual blacklist provider.
Install Wordfence, Scan your site
Delete and strip out any code that shouldn’t be there. Don’t know what code shouldn’t be in there?… Hire a Web Developer (Website Handyman) or learn how to fix it Here
If you are listed on any RBL list, just look for a link to be delisted, it’s usually listed as a form to fill out or a link to press, sometimes you have to fill out a really long form… just fill it out, there’s not really much your host can do other then fill these forms out for you if you have a really Great Host. they will sub Once you have checked your RBL listing status, you are pretty much set. If the
How to use and our thoughts on EWWW Image Optimizer.
The EWWW Image Optimizer is a WordPress plugin that will automatically optimize your images as you upload them to your blog. It can optimize the images that you have already uploaded, convert your images automatically to the file format that will produce the smallest image size (make sure you read the WARNINGS), and optionally apply lossy reductions for PNG and JPG images.
Video Guide
Why use EWWW Image Optimizer?
Your pages will load faster. Smaller image sizes means faster page loads. This will make your visitors happy, and can increase ad revenue.
Faster backups. Smaller image sizes also means faster backups.
Less bandwidth usage. Optimizing your images can save you hundreds of KB per image, which means significantly less bandwidth usage.
Super fast. The plugin can run on your own server, so you don’t have to wait for a third party service to receive, process, and return your images. You can optimize hundreds of images in just a few minutes. PNG files take the longest, but you can adjust the settings for your situation.
Best JPG optimization. With JPEGmini integration, nothing else comes close (requires an API subscription).
Better PNG optimization. You can use pngout, optipng, and pngquant in conjunction.
Root access not needed Pre-compiled binaries are made available to install directly within the WordPress folder, and cloud optimization is provided for those who cannot run the binaries locally.
Optimize everything With the wp_image_editor class extension, and the ability to specify your own folders for scanning, any image in WordPress can be optimized.
By default, EWWW Image Optimizer uses lossless optimization techniques, so your image quality will be exactly the same before and after the optimization. The only thing that will change is your file size. The one small exception to this is GIF animations. While the optimization is technically lossless, you will not be able to properly edit the animation again without performing an –unoptimize operation with gifsicle. The gif2png and jpg2png conversions are also lossless but the png2jpg process is not lossless. The lossy optimization for JPG and PNG files uses sophisticated algorithms to minimize perceptual quality loss, which is vastly different than setting a static quality/compression level.
The tools used for optimization are jpegtran, jpegmini, optipng, pngout, pngquant, and gifsicle. All of these are freely available except JPEGmini. Images are converted using the above tools and GD or ‘convert’ (ImageMagick).
EWWW Image Optimizer calls optimization utilities directly which is well suited to shared hosting situations where these utilities may already be installed. Pre-compiled binaries/executables are provided for optipng, gifsicle, pngquant, cwebp, and jpegtran. Pngout can be installed with one-click from the settings page. If none of that works, there is a cloud option that will work for any site.
If you need a version of this plugin for cloud use only, see EWWW Image Optimizer Cloud. It is much more compact as it does not contain any binaries or any mention of the exec() function.
Bulk Optimize
There are two functions on the Bulk Optimize page. One is to optimize all images in the Media Library. The Scan and Optimize is for everything else. Officially supported galleries (GRAND FlaGallery and NextGEN) have their own Bulk Optimize pages.
Skips Previously Optimized Images
All optimized images are stored in the database so that the plugin does not attempt to re-optimize them unless they are modified. On the Bulk Optimize page you can view a list of already optimized images. You may additionally choose to remove individual images from the list, or use the Force optimize option to override the default behavior. The re-optimize links on the Media Library page also force the plugin to ignore the previous optimization status of images.
WP Image Editor
All images created by the built-in WP_Image_Editor class will be automatically optimized. Current implementations are GD, Imagick, and Gmagick. Images optimized via this class include Meta Slider, BuddyPress Activity Plus (thumbs), WP Retina 2x, Imsanity, Simple Image Sizes, Hammy, Animated GIF Resize and probably countless others. If you are not sure if a plugin uses WP_Image_Editor, post your question in the support forums.
Optimize Everything Else
Site admins can specify any folder within their wordpress folder to be optimized. The ‘Scan and Optimize’ option under Media->Bulk Optimize will optimize theme images, BuddyPress avatars, BuddyPress Activity Plus images, Meta Slider slides, WP Symposium images, GD bbPress attachments, Grand Media Galleries, and any user-specified folders. Additionally, this tool can run on an hourly basis via wp_cron to keep newly uploaded images optimized. Scheduled optimization should not be used for any plugin that uses the built-in WordPress image functions unless you have disabled automatica optimization.
WP-CLI
Allows you to run all Bulk Optimization processes from your command line, instead of the web interface. It is much faster, and allows you to do things like run it in ‘screen’ or via regular cron (instead of wp-cron, which can be unpredictable on low-traffic sites). Install WP-CLI from wp-cli.org, and run ‘wp-cli.phar help ewwwio optimize’ for more information.
NextGEN Gallery
Features optimization on upload capability, re-optimization, and bulk optimizing. The NextGEN Bulk Optimize function is located near the bottom of the NextGEN menu, and will optimize all images in all galleries. It is also possible to optimize groups of images in a gallery, or multiple galleries at once. NOTE: Does not optimize thumbnails on initial upload for legacy (1.9.x) versions of NextGEN, but instead provides a button to optimize thumbnails after uploading images. No further updates will be provided for NextGEN legacy support, use NextCellent instead.
NextCellent Gallery
Features all the same capability as NextGEN, and is the continuation of legacy (1.9.x) NextGEN support.
GRAND Flash Album Gallery
Features optimization on upload capability, re-optimization, and bulk optimizing. The Bulk Optimize function is located near the bottom of the FlAGallery menu, and will optimize all images in all galleries. It is also possible to optimize groups of images in a gallery, or multiple galleries at once.
Image Store
Uploads are automatically optimized. Look for Optimize under the Image Store (Galleries) menu to see status of optimization and for re-optimization and bulk-optimization options. Using the Bulk Optimization tool under Media Library automatically includes all Image Store uploads.
When it comes to building a website, there are few ways to approach it. You can build an entire website in one fell swoop with all the features and functionality you need. Sounds easy right? Well if you have all the pieces then it definitely is. This includes all the content, graphics, Videos, the features list you want, the Needed budget.
The Modular approach lets you get started when you still need some of these pieces to the puzzle. Building the website in this manner lets you plan for future growth and is easy on the pocket book.
This method also lets you spread your website across multiple content management systems (CMS)
Most people find out fairly quickly that building a website is a lot more work then it first appears and that there are some things that you are told you need that you never knew even existed, it can be quite an overwhelming experience.
I say “Think of A Website like a House”. You see when you build a house you need blueprints and a contractor to build it, Just like a website needs a Layout Plan and a Web Developer to build it.
When you got the plans and team ready to start building you need to find a patch of land to build your house on just like you need to find a patch of online land to place your website on… this is called Hosting which just like land comes with a yearly fee.
Next you need to get your home it’s own address so that people can find it. This is the same as buying your website name or “Domain registration”. This registration is only the name of the website, it is not the website itself,… the files, the database, images. It just points to the patch of online land you have built your website on, that’s all.

 Follow these steps to fix your compromised/hacked site that may be mailing out spam with your name written all over it.
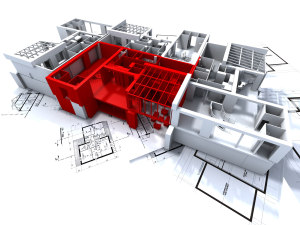 The Modular approach lets you get started when you still need some of these pieces to the puzzle. Building the website in this manner lets you plan for future growth and is easy on the pocket book.
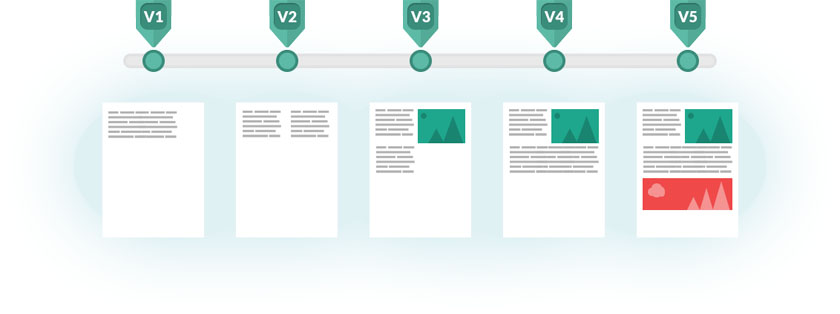
 I say “Think of A Website like a House”. You see when you build a house you need blueprints and a contractor to build it, Just like a website needs a Layout Plan and a Web Developer to build it.